Building a website can seem like a difficult undertaking, with the appropriate advice, it can actually be enjoyable and gratifying. In the current digital era, having a website is crucial whether you want to start a blog, create an online store, or display your portfolio. We’ll walk you through the process of building a website from scratch in this guide. Everything from picking a domain name through creating and establishing your site will be covered.
Things to Consider Before Making a Website
Undoubtedly, each year, millions of sites launch on the web. That is why it’s important to create yours in such a way that it can compete with others. Here is a list of things that you should consider before making your website.
● Choose a reliable hosting company.
● Make sure your site meets the WordPress minimum requirements.
● Don’t forget to check the Uptime provided by your Web Hosting Company.
● Select reputable domain extension
Now, you know which things are essential for your website, it’s time to learn how you can create your own site. Let’s discuss the steps one by one for more information.
Step by Step Process to Make a Website
Creating a website is an art, and for that, you won’t have to follow complicated methods. If you know some basic rules, you’ll be able to develop an attractive website. To make your work easier, we have created a step by step guide that would be beneficial for technical and non-technical users.
Step 1: Choose a Good Hosting
If you want your website to work faster, it’s essential to choose reliable hosting. In case you are using WordPress, then it recommends to use Bluehost as they have the best customer support, it is easy to set up, and offers a free domain. Also, they are beginner-friendly, which means anyone can use their hosting without facing any issues.
Apart from that, they offer different hosting packages for beginners and business users. We recommend you to try the basic plan as it’s cheap and suitable for beginners. Now, you have chosen the web hosting plan, it’s time to launch your first website. And for that, you have to sign up with Bluehost. Below are the steps that you can follow to complete this process.
Step 2: Signing Up with Bluehost
Here are the steps that you can follow to sign up with Bluehost. You don’t have to worry about anything because the steps are simple, and anyone can follow them. Make sure not to skip any point.

Visit the Bluehost official website and look for the “Get Started” option. You will find it near the home page.
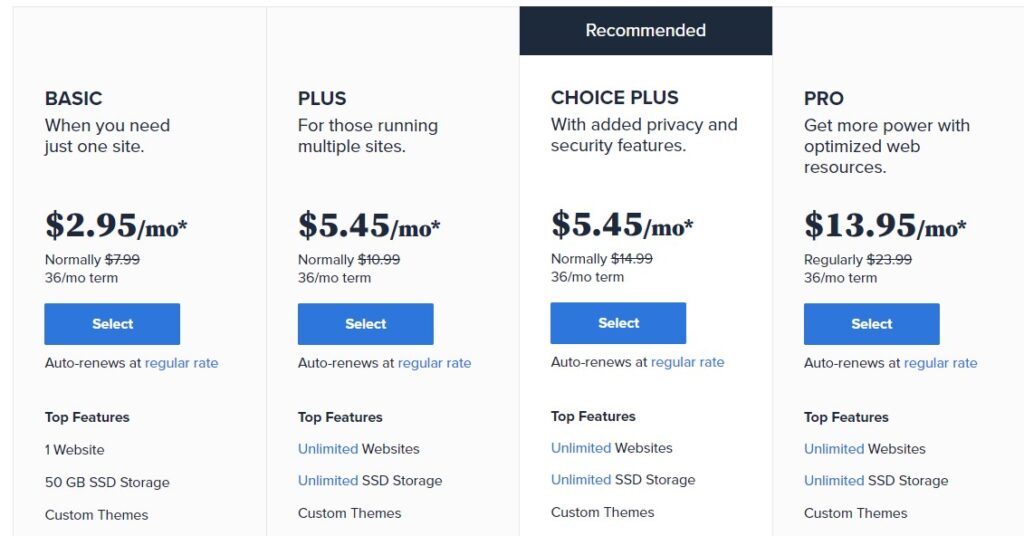
After that, you will be redirected to the web hosting page, from where you can select your desired package. If you are a beginner, we recommend choosing the Basic Plan due to its low price. You can see other plans, including Plus, Choice Plus, and Pro. Plus, the good news is that you can upgrade anytime if you want to use more features.
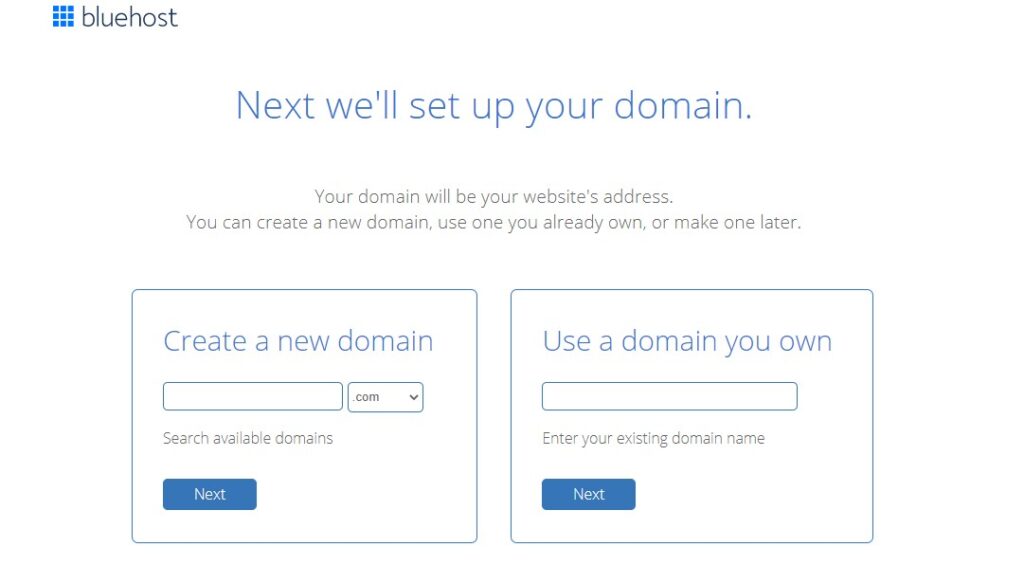
After selecting the hosting, you will be asked to create a new domain or use your old one. Once you are done with entering the domain name, hit the “Next” option.
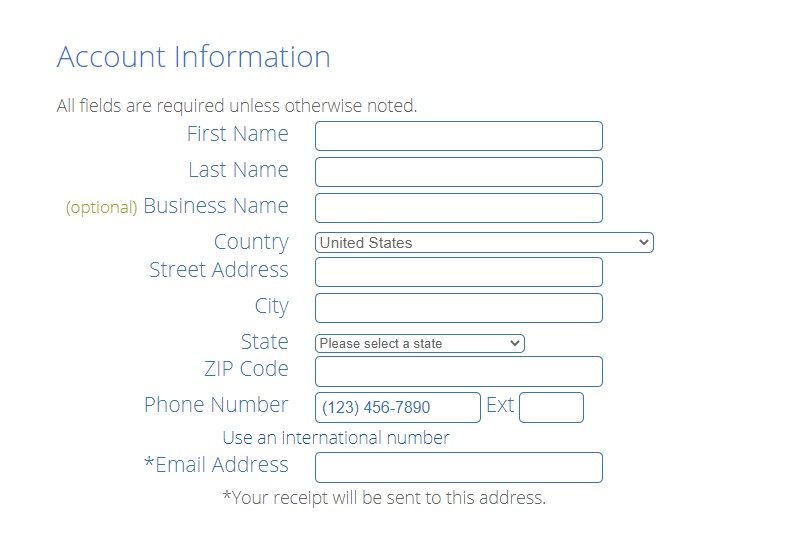
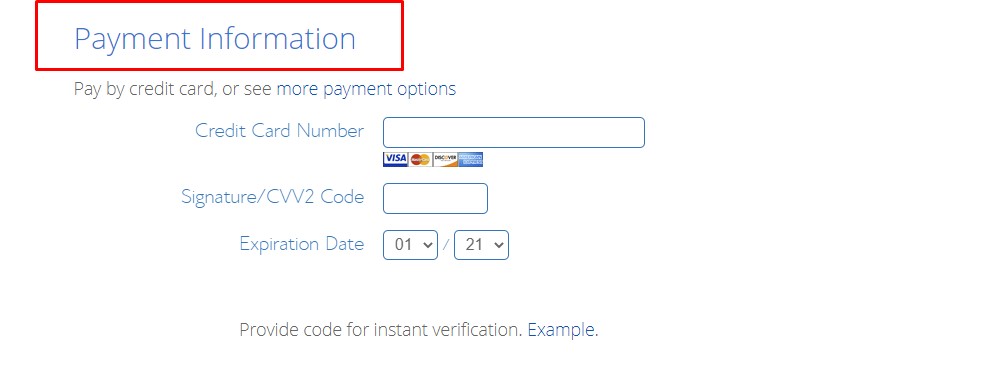
On the next page, you will be asked to enter your “Account Information” and “Payment details.” Make sure to fill the data right to avoid any issues.
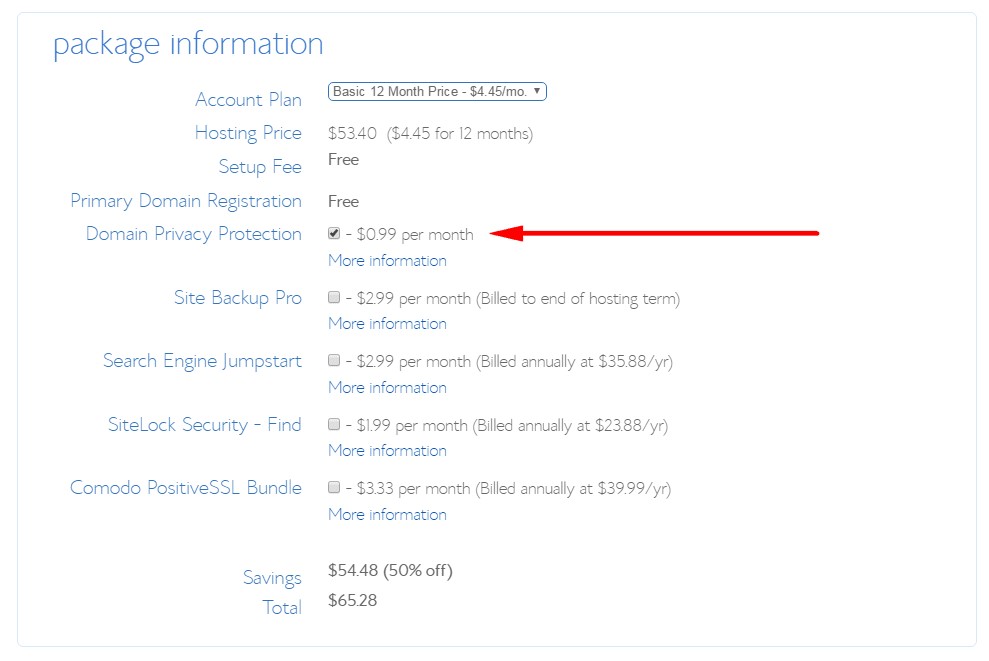
You can also pick the ADD-ONS from the Package Information, such as Domain Privacy Protection, Site Backup Pro, etc.
After submitting the details, accept the license agreement and click the “Submit” option.

Now you can create your account and set your password.
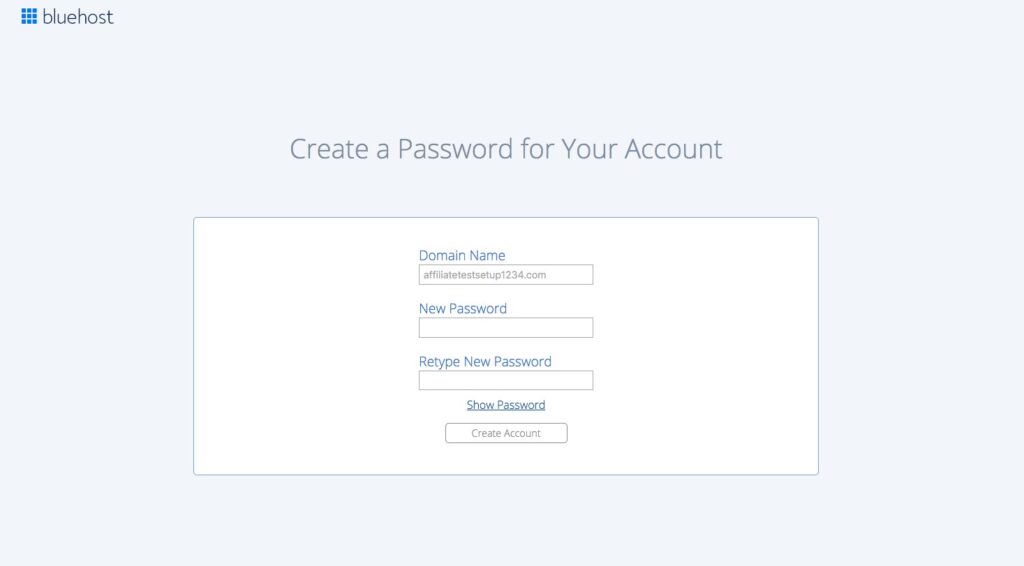
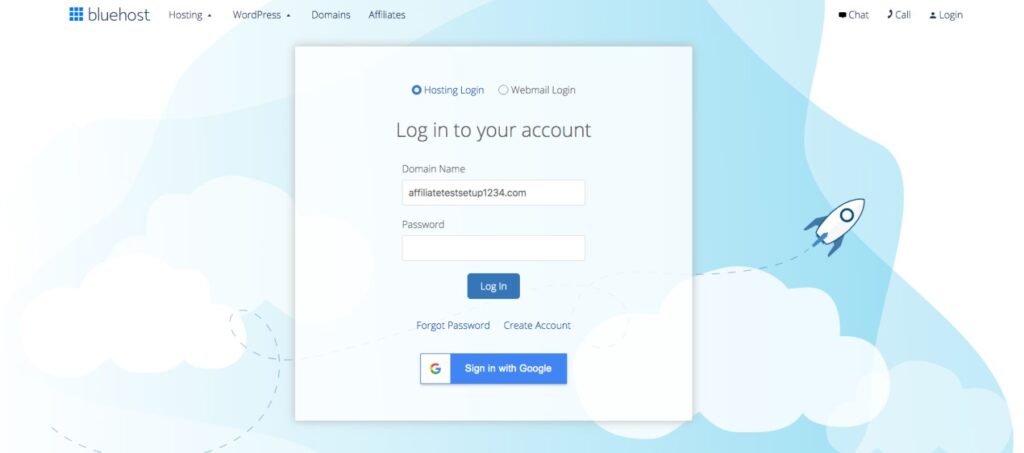
Once it’s done, just login to your Bluehost account and follow the following picture steps in creating your website.
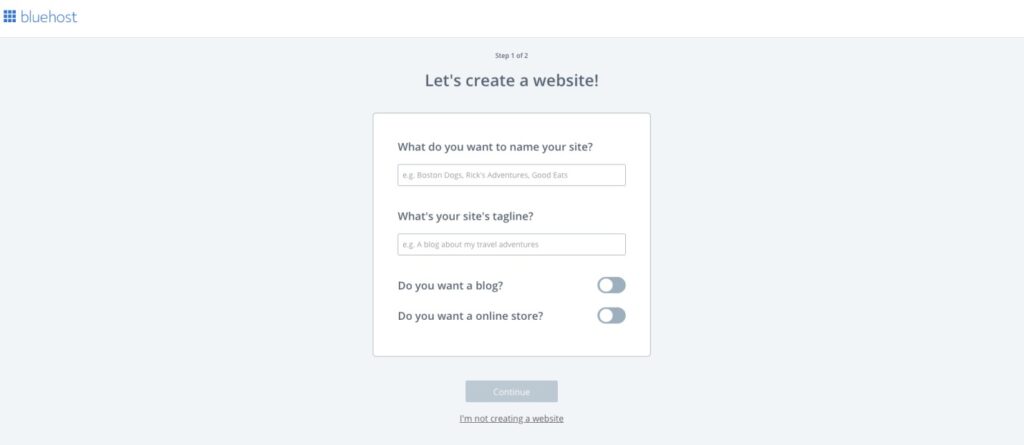
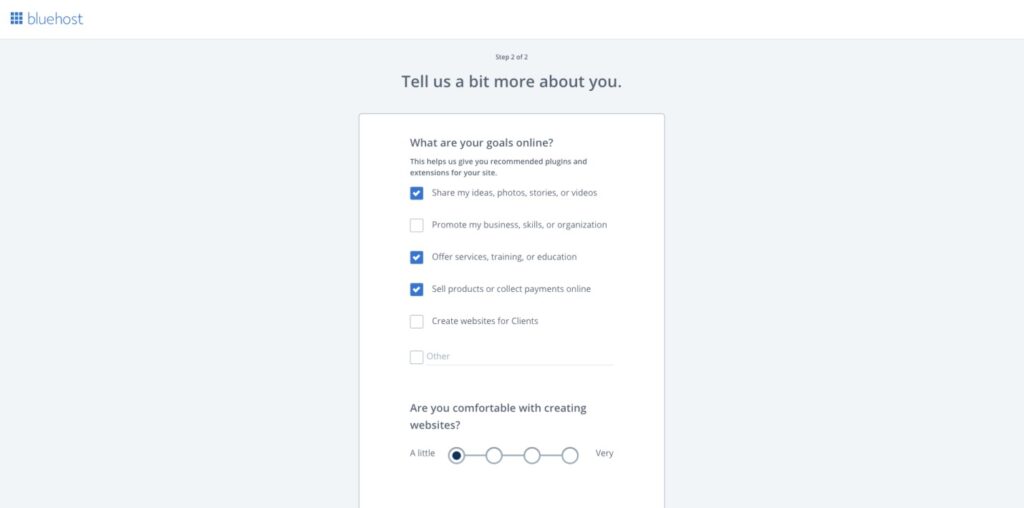
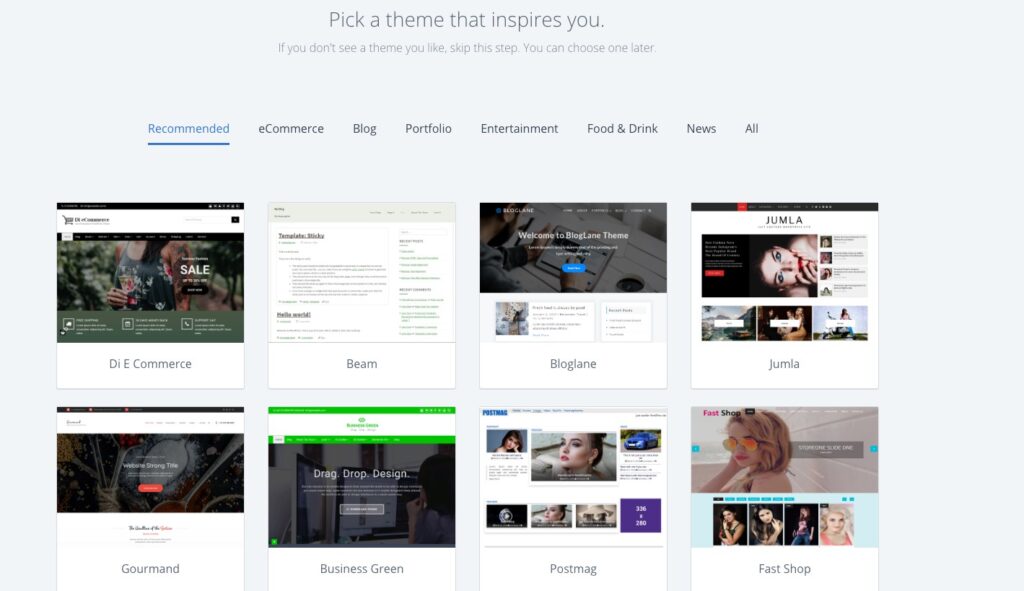
Once you have done all of that, WordPress will be automatically installed.
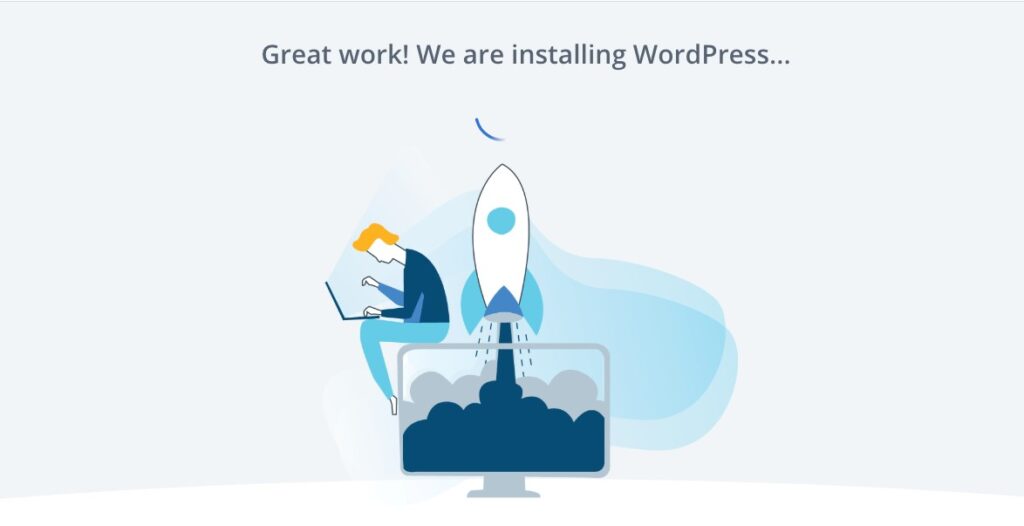
Wait for a few seconds, and your first dashboard will be ready.

It’s all done. You can now click the button “Log in to WordPress” and start building your website.
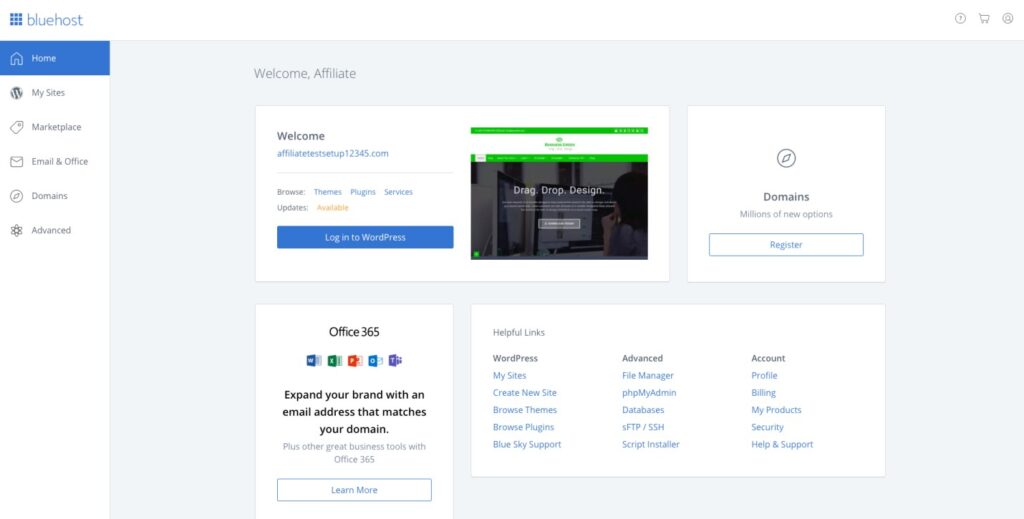
Setting up the WordPress dashboard
Now, from the dashboard, you can conveniently create your WordPress website.
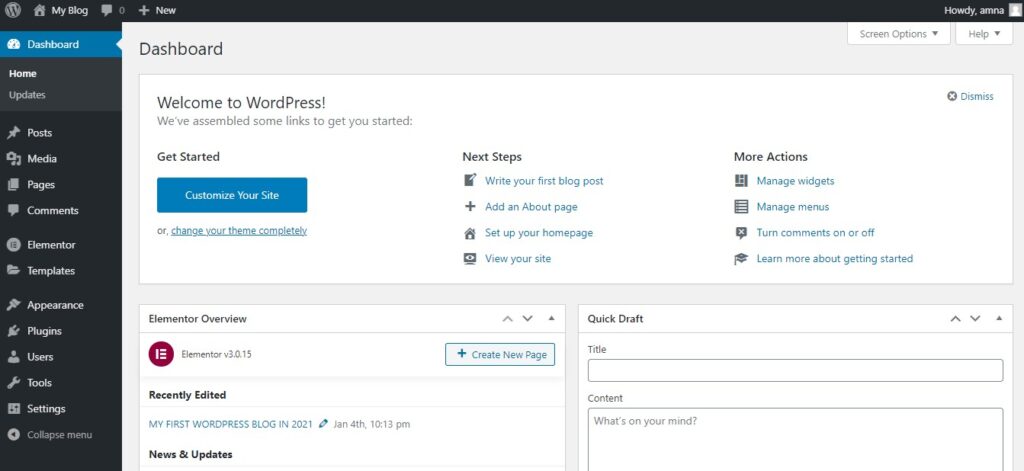
As a beginner, it may be difficult for you to customize changes, but in the next step, we will explain how to use the WordPress admin panel so that you can make the necessary modifications easily.
Step 3: Learn About WordPress
WordPress doesn’t require much effort when it comes to arranging things. If you are a beginner and want to create an attractive site, WordPress will help you to achieve it. Below is our guide that will help you to learn more about WordPress and how you can customize things.
Go back to your WordPress Dashboard and you will see different options on the dashboard, including posts, media, pages, settings, and much more. That is where you have to perform all the changes to make your first website.
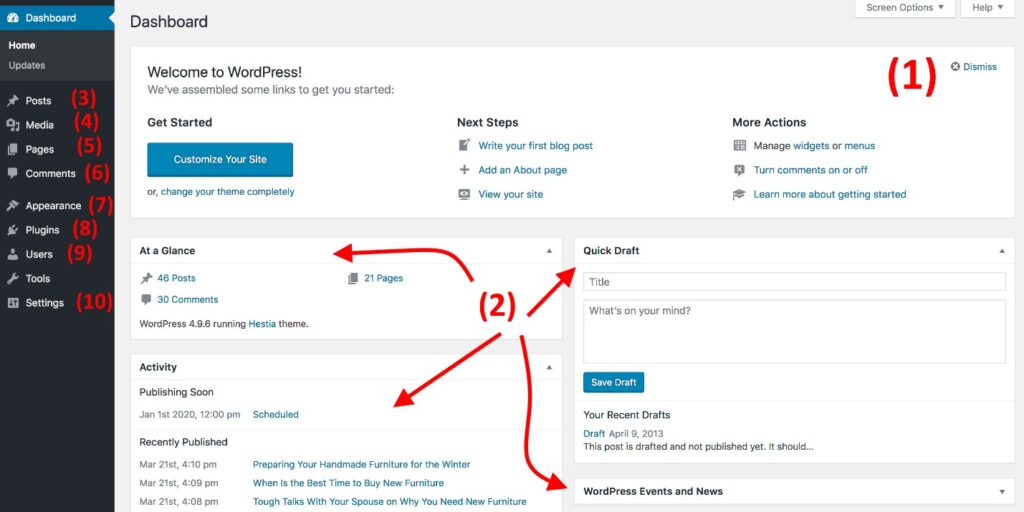
Let’s take a look at the different options you’ll find on the dashboard:
- Home: Use this option to edit your main page.
- Status Page: This page provides a comprehensive overview of your website’s performance and health.
- Posts: Here, you can create and manage all of your website’s blog posts. You can add new posts, edit existing ones, and organize them by category or tag.
- Media: Here, you can upload and manage all of your images.
- Pages: In this section, you’ll find your site’s pages, such as the Home Page, About Us, Privacy Policy, and more.
- Comments: From this area, you can view, approve, or reject comments, as well as modify the comment settings to meet your preferences.
- Appearances: This is where you can customize the visual aspects of your website. This includes modifying the theme, adding or removing widgets, and editing the menus.
- Plugins: is where you can manage and install plugins, which are pieces of software that add new functionality to your website. Too many plugins can slow down your site’s performance, so it’s important to only install the ones you need
These are the essential sections that you will find in WordPress. By using them, you can easily customize your website. In the next part of this blog, I will explain some important tips that can help you make your first website more appealing.
Change & Customize Theme
You can easily change and customize your website’s theme, and for that, you have to follow the complete procedure. Here we will be downloading the Astra theme, but you can choose according to your wish. Let’s see how you can do it.
- From the menu, select the option “Appearance.” You will see different options, so choose the “Theme” option. After that, click “Add New.”
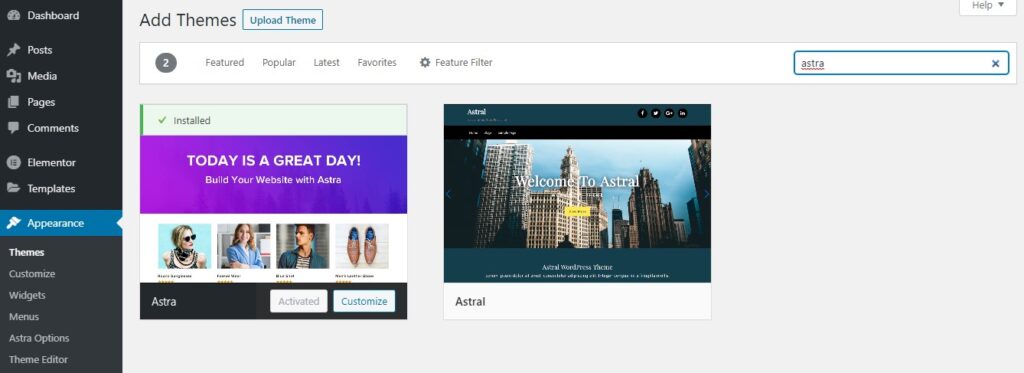
- From there, you can add the theme name, or you can select from the suggestions provided by WordPress.

- Once you have chosen a theme, you can select the “Install” option. You can also preview the theme you selected before installing.
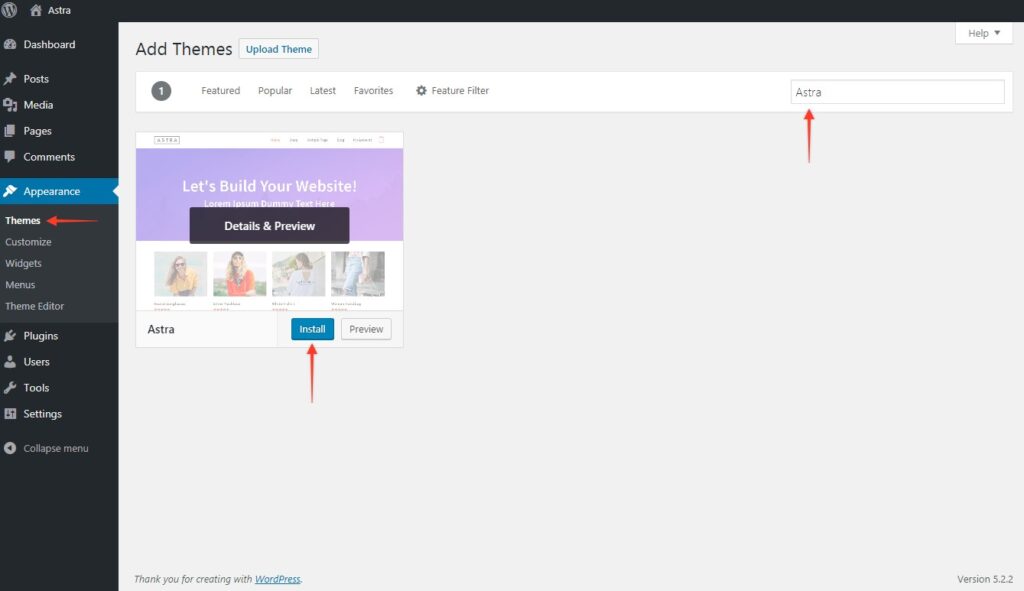
The good news is that you can find many free themes on WordPress, but you’ve to buy them if you want to enjoy the advanced features.
In case you want to customize themes, you can do it quickly by choosing the “Customize” option under Appearance. This option will take you to the page where you can easily change the site name, adjust headers, create menus, and much more. Plus, you can set the theme according to browser, mobile devices, and tablets. See the image below.
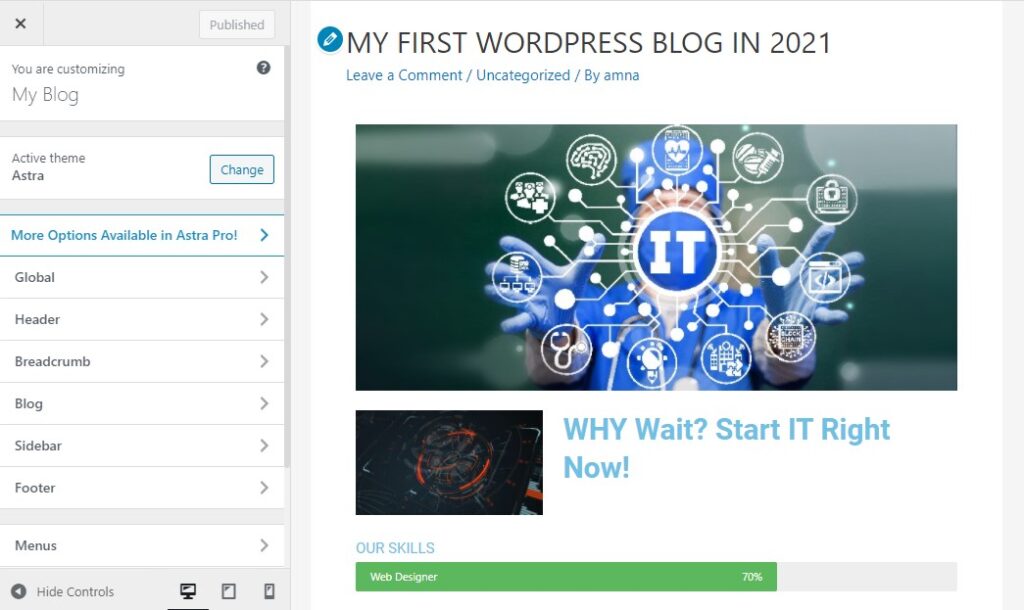
Apart from editing the Main Page, there are many other things that you can do with your theme, such as:
- Change Logo
- Add Colors
- Change Background
- And more.
Let’s discuss how you can perform all these changes.
1. Change the Logo
To change the logo, visit Appearance, click the “Astra Options.” There you will see different options. Hence we want to change the logo, so we will click the “Upload Logo” option. You can also set the color of the logo.
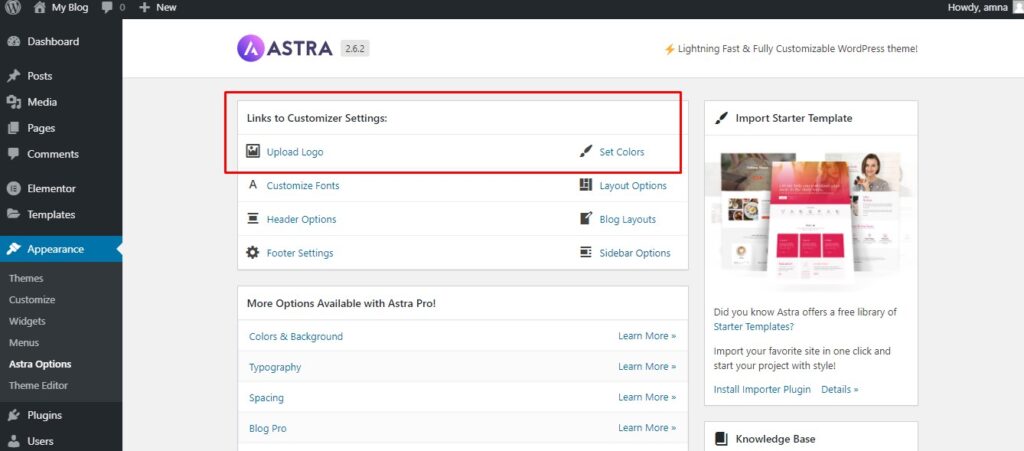
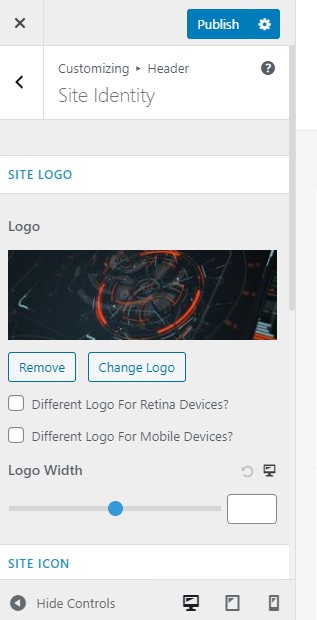
After clicking the “Upload Logo” option, it will move you to the new page where you can easily upload the image that you want to set as a logo.
Once you are done, click the “Publish” button to see the changes.
2. Change Background
You can quickly change the background from the Astra Options, but for that, you have to purchase the theme.
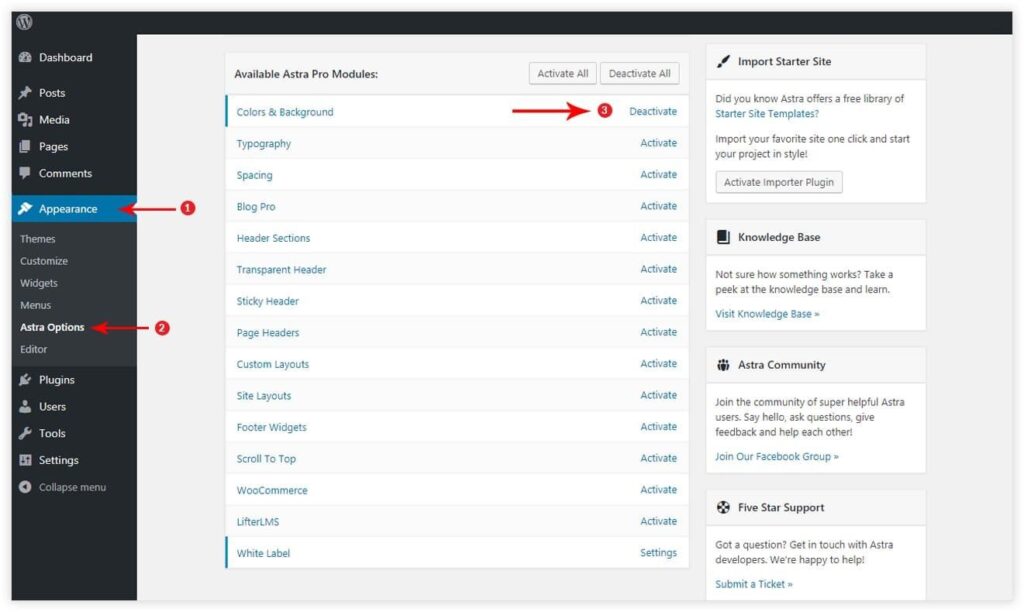
Once you have bought the theme, you can adjust the background of your own choice and can different colors as well as images.
3. Adjust Site Layout
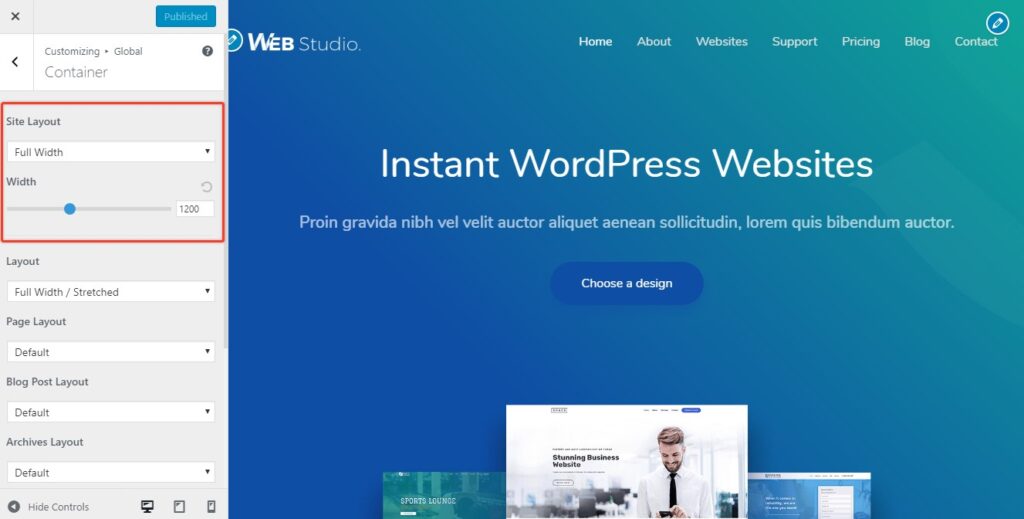
This theme allows you to customize the site layout. To change the site layout, go to “Appearance” and click the “Customize” option. Then, select “Global” and click “Site Layout.” You can now choose the layout that best fits your needs.
Create Pages
Here’s how you can create different blog pages if you’re creating a blog website:
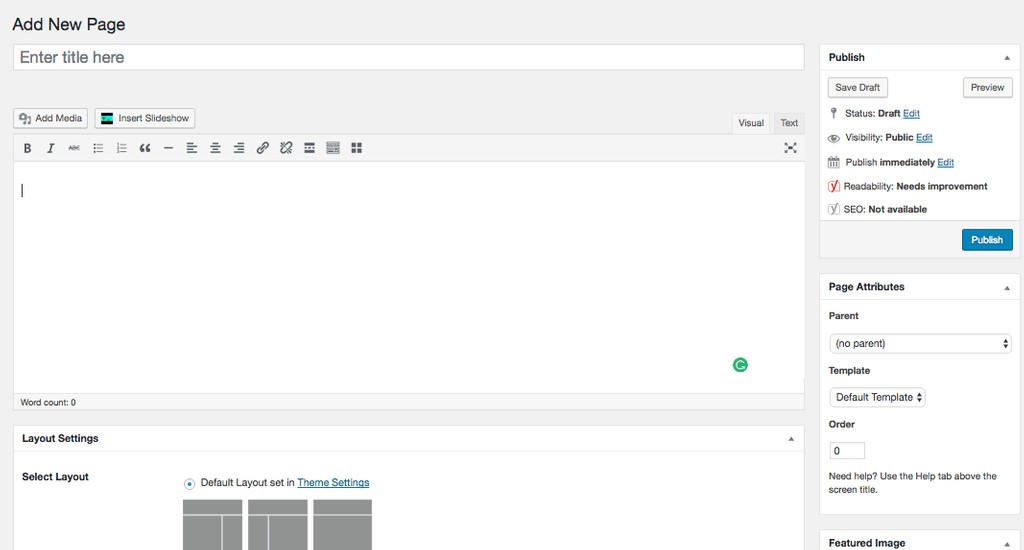
- Go to the WordPress dashboard and click the “Pages” option.
- Select the “Add New” option. You will be taken to a new page where you can add a title, images, and a text box.
- Once you are done with all the changes, click the “Publish” option. This is how you can create different pages, including Home, About Us, etc.
Create and Adjust Menu
The navigation menu is an integral part of your site. That is why you must know how to add it in WordPress. The good news is that adding a menu in WordPress doesn’t require any coding. You can easily add the items, give your menu a name, and you are good to go.
Here is what you can do to create a menu in WordPress:
- First, go to “Appearance” and click the “Menus” option. To create it, you have to add the name in the “Menu Name” box.
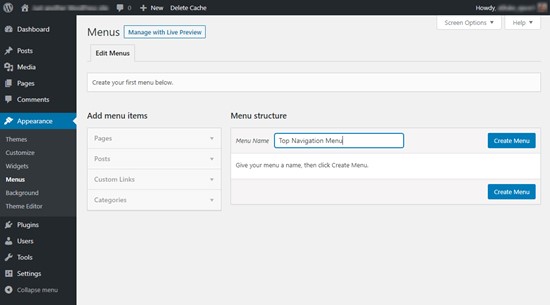
- After that, start adding pages and categories to create an attractive menu.
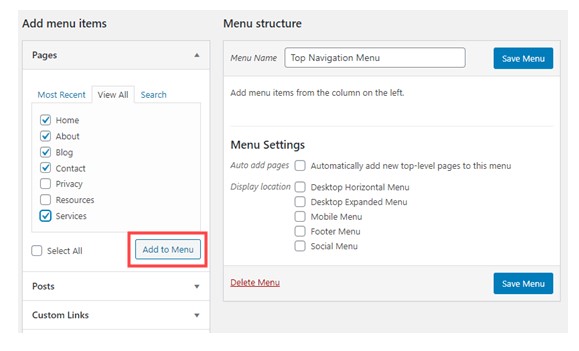
- Once the pages and categories are added, you can easily arrange them according to your website requirements.
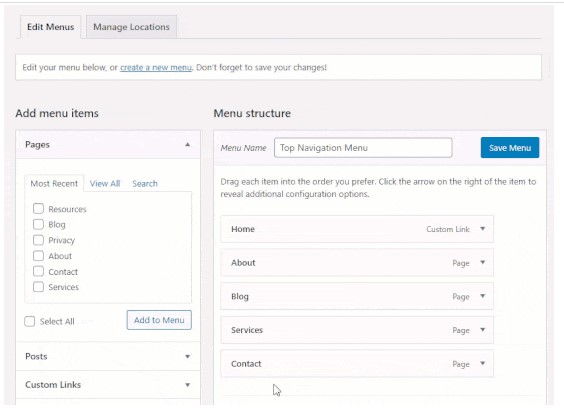
- You can also select your menu location, such as Top Menu, Footer Menu, etc. In the latest themes, you’ll find 5 different locations where you can place the menu.
- Once you are done, click the “Save Menu” option, and your menu is ready.
If you have put a menu in the navigation bar, it will look like the image below. You can also add it to the footer, widget, etc.

Add Plugins
To make your work easier, WordPress allows you to add different plugins. With these plugins, you can create contact us pages, add new forms to your site, optimize for SEO, and more. Plugins are also useful because they allow for drag and drop functionality. WordPress recommends certain plugins, and to add them, follow the steps below:
From the dashboard, select the option “Plugins.” You can find this option on the left side. Now, under Installed Plugins, select the “Add New” option. This will help you to add free new plugins to your site.
- From the dashboard, select the option “Plugins.” You can find this option on the left side. Now, under Installed Plugins, select the “Add New” option. This will help you to add free new plugins to your site.
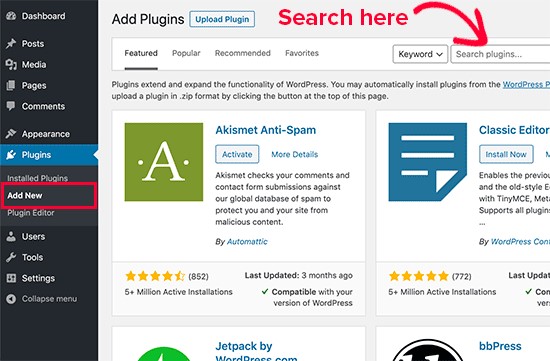
- In case you want to search for new plugins, you can do it easily by clicking the “Search” option.
- Once you have selected the plugin, you can click the “Install” option.
In case you have the zip file of your plugin, you can upload it as well by clicking the “Upload Plugin” option.
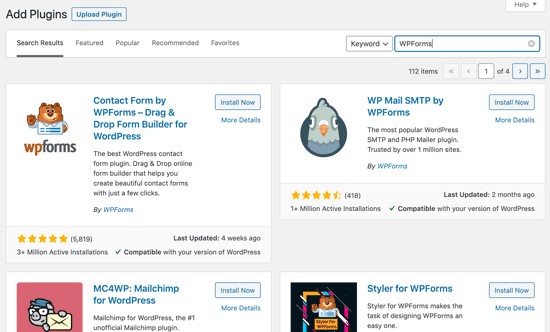
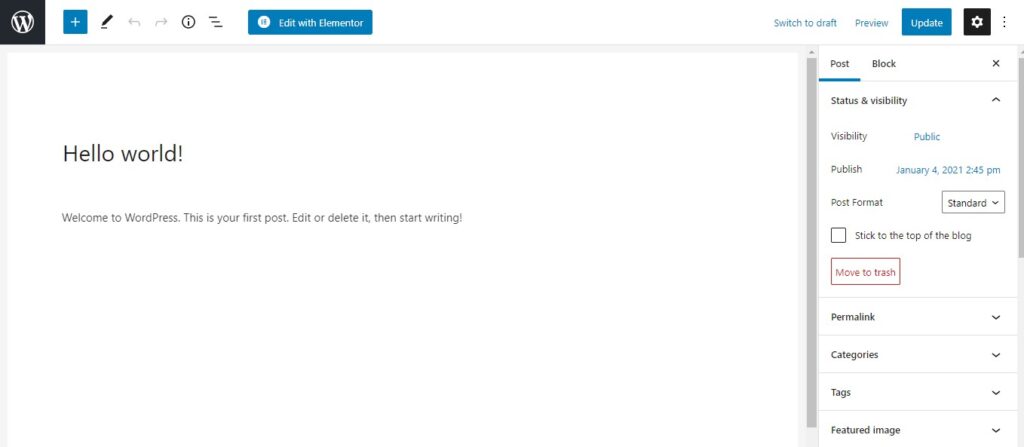
We recommend you to download Elementor Website Builder Plugin for your site. It’s a useful tool for those who don’t know much about coding and want to create websites very quickly. Using the Drag & Drop Editor, you can create attractive layouts and perform responsive editing. In addition, it contains 300+ designs to make your work appealing.
Why Choosing WordPress is a Good Idea?
WordPress is undoubtedly the right choice for beginners because it allows them to control the settings completely. It’s free and doesn’t charge any amount except for premium themes and plugins. Plus, for non-tech savvy folks, it’s a perfect choice as they can manage everything without writing a single piece of code.
So, those who are new and want to start their own online business should consider WordPress a reliable option.
Warp up
In today’s digital age, a professional website has become an absolute necessity for any business. Whether you are running a small startup or a large corporation, a well-designed website is crucial to attract customers and establish a strong online presence. Without a website, your business may appear outdated, unprofessional, and less trustworthy in the eyes of your target audience.
That’s why we’ve put together this guide, which we think will be useful for beginners. So don’t wait any longer – go ahead and launch your new site before it’s too late! And be sure to share your experience with us in the comments section below.
